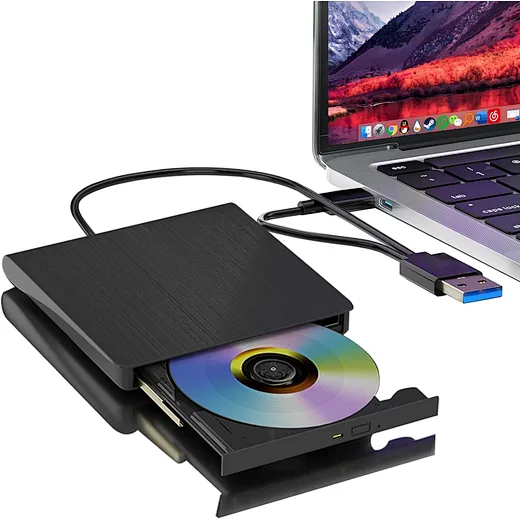
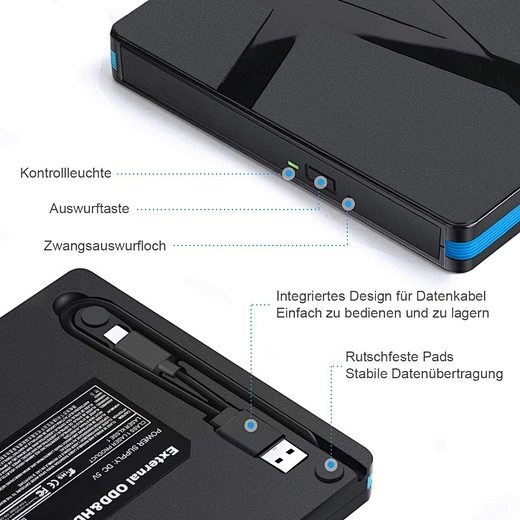
can you use external optical drive to download windows
author: li
2025-11-13
Can You Use an External Optical Drive to Download Windows? A Step-by-Step Guide
If you’ve ever found yourself needing to install Windows on a laptop or desktop without a built-in optical drive—whether your device is a slim modern laptop, a custom desktop without an internal DVD/CD drive, or your old drive has stopped working—you might wonder: Can you use an external optical drive to download (or more accurately, install) Windows? The short answer is yes—but there are key steps, tools, and caveats to understand to make the process smooth. Let’s break this down clearly, so you can get Windows up and running with an external drive.
First: Clarify “Download” vs. “Install”
Before we dive in, let’s clear up a common wording mix-up. An external optical drive (like a USB-connected DVD/CD drive) can’t download Windows from the internet—that’s done via a web browser or Microsoft’s official tools. Instead, the drive’s role is to install Windows from a physical Windows installation disc (a DVD you purchased or burned yourself). So when we talk about using an external optical drive for Windows, we’re focusing on the installation phase—using the drive to read the Windows disc and set up the OS on your device.
What You’ll Need First
To use an external optical drive for Windows installation, gather these items first to avoid delays:
- A functional external optical drive: Make sure it’s a DVD drive (most Windows installation media is on DVD) and connects via USB (USB 2.0 or 3.0 works—3.0 is faster, but 2.0 is sufficient). Check that the drive is compatible with your device’s OS (e.g., if you’re installing Windows 11 on a Windows 10 PC, the drive should work with both).
- A Windows installation disc: This can be a retail DVD you bought from Microsoft or a burned disc you created using the Windows Media Creation Tool (we’ll cover how to make one later, in case you don’t have a physical disc).
- A compatible device: The PC/laptop where you’re installing Windows must have a USB port (to connect the external drive) and meet Windows’ minimum system requirements (e.g., 4GB RAM, 64GB storage for Windows 11).
- Backup of data: Installing Windows will erase the drive where you’re putting the OS. Back up photos, documents, and apps to an external hard drive or cloud storage first.
- Product key (optional but recommended): If you’re installing a paid version of Windows (not a pre-activated copy), have your 25-character product key ready to activate Windows after installation.
Step 1: Prepare the Windows Installation Disc (If You Don’t Have One)
If you don’t already have a physical Windows installation DVD, you’ll need to create one using another working PC (since you can’t burn a disc on the device you’re fixing yet). Here’s how:
- On a working PC, go to the Microsoft Windows Download page (choose Windows 10 or 11, depending on your needs).
- Download the Windows Media Creation Tool and run it.
- Select “Create installation media (USB flash drive, DVD, or ISO file) for another PC” and click “Next.”
- Choose your language, edition, and architecture (32-bit or 64-bit—most modern devices use 64-bit) and click “Next.”
- Select “DVD” as the media type (instead of USB) and insert a blank DVD into the PC’s optical drive (or an external drive connected to this PC).
- Follow the tool’s prompts to burn the Windows ISO file to the DVD. Once done, eject the DVD—this is your installation disc.
Step 2: Connect the External Optical Drive to Your Target Device
Now, move to the PC/laptop where you’re installing Windows:
- Plug the external optical drive into one of the device’s USB ports. If the drive has a separate power cord (some do), plug that into a power outlet too—this ensures the drive gets enough power to read the disc.
- Insert your Windows installation DVD into the external drive.
Step 3: Boot Your Device from the External Optical Drive
For your device to recognize the external drive as the installation source, you need to change the “boot order” in the BIOS/UEFI settings. Here’s how:
- Turn on the target device. As soon as it starts (look for the manufacturer’s logo—Dell, HP, Lenovo, etc.), press the BIOS key to enter settings. This key varies by brand:
-
- Dell: F2 or F12
-
- HP: F10 or Esc
-
- Lenovo: F1 or F2
-
- Acer: F2 or Del
-
- If you’re unsure, check the manufacturer’s website or look for a message on screen (e.g., “Press F2 to enter BIOS”).
- In the BIOS/UEFI menu, find the “Boot” tab or section. Look for “Boot Order” or “Boot Priority.”
- Move the external optical drive (it might be labeled something like “USB DVD Drive” or the drive’s brand name, e.g., “LG External DVD”) to the top of the boot order—this tells the device to check the drive first when turning on.
- Save the changes and exit the BIOS. On most menus, this is done by pressing F10 (choose “Yes” to save) or selecting “Save and Exit.”
Step 4: Follow the Windows Installation Wizard
Once your device reboots, it will read the Windows disc from the external drive and launch the installation wizard. Here’s what to do next:
- When prompted, select your language, time, and keyboard input method, then click “Next.”
- Click “Install Now” to start the process.
- If asked for a product key:
-
- If you have one, enter it now.
-
- If you don’t (e.g., you’re reinstalling Windows on a device that already had it activated), select “I don’t have a product key”—you can activate Windows later.
- Choose the Windows edition you want to install (e.g., Windows 11 Pro, Windows 10 Home)—make sure it matches the edition your product key is for (if you have one).
- Accept the license terms and click “Next.”
- Select “Custom: Install Windows only (advanced)” (this is the option for a clean install, which is recommended for fixing issues or setting up a new drive).
- Choose the drive/partition where you want to install Windows. If you’re replacing an old OS, select the partition labeled “System” and click “Delete” (note: this erases all data). Then select the unallocated space and click “Next.”
- Windows will now start installing. This can take 20–60 minutes—your device will restart several times during this process. Do not eject the DVD or unplug the external drive until the installation is complete.
Step 5: Complete Post-Installation Setup
After Windows finishes installing, you’ll go through a few more steps to set up your device:
- Select your region and keyboard layout again (if prompted).
- Connect to a Wi-Fi or Ethernet network.
- Create a user account (name, password, and security questions).
- Choose privacy settings (e.g., whether to allow location services, diagnostic data).
- Once setup is done, Windows will load the desktop. You can now eject the installation DVD from the external drive and unplug the drive (if you don’t need it anymore).
- Finally, activate Windows: Go to Settings > System > Activation and enter your product key if you haven’t already. If your device was previously activated with the same edition of Windows, it should activate automatically over the internet.
Common Issues & How to Fix Them
Even with the right steps, you might run into small problems. Here are easy fixes:
- External drive not detected in BIOS: Try a different USB port (preferably a USB 2.0 port—some USB 3.0 ports don’t work in BIOS). If the drive has a power cord, ensure it’s plugged in. Also, check if the drive works on another PC to rule out a faulty drive.
- Installation disc not reading: Clean the DVD with a soft cloth (wipe from center to edge) to remove smudges. If the disc is scratched, try burning a new one.
- Boot loop (device restarts but doesn’t install): Double-check the boot order in BIOS—make sure the external drive is still first. Also, verify that your device meets Windows’ system requirements (e.g., TPM 2.0 for Windows 11).
Final Thoughts: Is an External Optical Drive Still Useful for Windows?
While USB flash drives are more common for Windows installation today (they’re smaller, faster, and don’t require a disc), external optical drives are still a reliable option—especially if you have old Windows installation discs lying around or prefer physical media. The key takeaway is: Yes, you can absolutely use an external optical drive to install Windows—as long as you follow the steps to set up the drive, create a valid installation disc, and adjust your device’s boot order.
If you run into snags during the process, don’t hesitate to revisit the BIOS settings or try a different USB port—small tweaks often fix most issues. With a little patience, you’ll have Windows up and running in no time!
How to Use External DVD Drive on Windows 11
Related Article
Confused about how to fix half moon wall light? Our simple quick tips help you troubleshoot common issues and get your cozy fixture working again fast.
how to fix half moon wall light
In the age of TikTok, Instagram Reels, and 24/7 live broadcasting, the Selfie Stick has evolved from a "tourist gadget" into an essential professional tool.
who invented selfie stick