how to attach camera to tripod
author: LJ
2026-02-04
A Camera Tripod is the backbone of sharp, professional photos and smooth videos—whether you’re shooting landscapes, portraits, long exposures, or vlogs. But even the best Camera Tripod is useless if you don’t know how to safely attach your camera to it. If you’re asking how to attach camera to tripod, you’re not alone—this is one of the most common questions for beginner photographers (and even some hobbyists!). This 2025 news guide breaks down the simple, foolproof process for attaching any camera (DSLR, mirrorless, point-and-shoot, smartphone) to aCamera Tripod, shares pro tips for security and stability, troubleshoots common issues, and helps you get the most out of your tripod setup.
First: Know Your Camera Tripod Parts (Key Components)
Before learning how to attach camera to tripod, it’s critical to familiarize yourself with the key parts of a Camera Tripod and your camera that make attachment possible. Here’s what you need to know:
Tripod Head: The top part of the Camera Tripod that holds your camera. Most tripods have either a ball head (most common—flexible for quick adjustments) or a pan-tilt head (better for video, with smooth horizontal/vertical movement).Quick-Release Plate (QRP): A small, removable plate that attaches to the bottom of your camera. It slides into the tripod head for fast, easy attachment/detachment—this is the most common setup for modern Camera Tripods.1/4-Inch Screw: The standard screw (on the quick-release plate or directly on the tripod head) that threads into the bottom of your camera. Almost all consumer cameras (DSLR, mirrorless, point-and-shoot) have a 1/4-inch threaded hole for tripod attachment.Camera Threaded Hole: Located on the bottom of your camera (usually near the center of the base). This is where the tripod’s 1/4-inch screw attaches—never force the screw or use the wrong size (it will damage your camera).Locking Knob/Lever: On the tripod head—used to secure the quick-release plate or tighten the screw to hold your camera in place.
Tripod Head: The top part of the Camera Tripod that holds your camera. Most tripods have either a ball head (most common—flexible for quick adjustments) or a pan-tilt head (better for video, with smooth horizontal/vertical movement).Quick-Release Plate (QRP): A small, removable plate that attaches to the bottom of your camera. It slides into the tripod head for fast, easy attachment/detachment—this is the most common setup for modern Camera Tripods.1/4-Inch Screw: The standard screw (on the quick-release plate or directly on the tripod head) that threads into the bottom of your camera. Almost all consumer cameras (DSLR, mirrorless, point-and-shoot) have a 1/4-inch threaded hole for tripod attachment.Camera Threaded Hole: Located on the bottom of your camera (usually near the center of the base). This is where the tripod’s 1/4-inch screw attaches—never force the screw or use the wrong size (it will damage your camera).Locking Knob/Lever: On the tripod head—used to secure the quick-release plate or tighten the screw to hold your camera in place.
Pro Tip: If your Camera Tripod doesn’t have a quick-release plate (older models), you’ll attach the camera directly to the tripod head via the 1/4-inch screw—no extra steps needed for the plate.
What You’ll Need (Tools & Accessories)
Attaching your camera to a Camera Tripod requires minimal tools—most of which come with your tripod. Here’s the complete list:
Your camera (DSLR, mirrorless, point-and-shoot, or smartphone with a tripod adapter).A Camera Tripod (with quick-release plate, if applicable).Optional: Tripod adapter (for smartphones—attaches to the quick-release plate and holds your phone securely).Optional: Coin or screwdriver (for tightening the 1/4-inch screw if the quick-release plate doesn’t have a built-in handle).
Your camera (DSLR, mirrorless, point-and-shoot, or smartphone with a tripod adapter).A Camera Tripod (with quick-release plate, if applicable).Optional: Tripod adapter (for smartphones—attaches to the quick-release plate and holds your phone securely).Optional: Coin or screwdriver (for tightening the 1/4-inch screw if the quick-release plate doesn’t have a built-in handle).
Step-by-Step: How to Attach Camera to Tripod (Most Common Setup)
The vast majority of modernCamera Tripods use a quick-release plate system—this is the fastest and most convenient way to attach your camera. Follow these 5 simple steps (works for DSLR, mirrorless, and point-and-shoot cameras):
1. Prepare the Quick-Release Plate (QRP) from Your Camera Tripod
Start by removing the quick-release plate from your Camera Tripod head—this is where you’ll attach your camera first:
Locate the quick-release plate on top of your tripod head (it’s usually a small, flat metal or plastic plate).Loosen the locking knob or lever on the tripod head (turn counterclockwise or flip the lever open) to release the plate.Slide the quick-release plate out of the tripod head—set the tripod aside for now (make sure it’s stable on the ground).
Locate the quick-release plate on top of your tripod head (it’s usually a small, flat metal or plastic plate).Loosen the locking knob or lever on the tripod head (turn counterclockwise or flip the lever open) to release the plate.Slide the quick-release plate out of the tripod head—set the tripod aside for now (make sure it’s stable on the ground).
2. Attach the Quick-Release Plate to Your Camera
This is the most important step in how to attach camera to tripod—securing the plate to your camera correctly ensures safety:
Turn your camera upside down (gently—hold it with both hands to avoid drops) and locate the 1/4-inch threaded hole on the bottom.Align the 1/4-inch screw on the quick-release plate with the threaded hole on your camera. Make sure the plate is centered (this keeps your camera balanced on the tripod).Turn the screw clockwise by hand to thread it into the camera—don’t force it (over-tightening can strip the threads or damage your camera).Tighten the screw securely: Use the built-in handle on the quick-release plate (if available) or a coin/screwdriver (if needed). The plate should not wiggle or move on the bottom of your camera.Optional: If your quick-release plate has a safety strap or stopper, attach it to your camera (if compatible) for extra security—this prevents the camera from sliding off the plate.
Turn your camera upside down (gently—hold it with both hands to avoid drops) and locate the 1/4-inch threaded hole on the bottom.Align the 1/4-inch screw on the quick-release plate with the threaded hole on your camera. Make sure the plate is centered (this keeps your camera balanced on the tripod).Turn the screw clockwise by hand to thread it into the camera—don’t force it (over-tightening can strip the threads or damage your camera).Tighten the screw securely: Use the built-in handle on the quick-release plate (if available) or a coin/screwdriver (if needed). The plate should not wiggle or move on the bottom of your camera.Optional: If your quick-release plate has a safety strap or stopper, attach it to your camera (if compatible) for extra security—this prevents the camera from sliding off the plate.
Warning: Never attach the quick-release plate to a camera lens (even if the lens has a threaded hole). Lenses are not designed to support the weight of the camera—this will damage the lens mount and cause the camera to fall.
3. Mount the Camera (with Plate) to the Tripod Head
Now that the quick-release plate is attached to your camera, it’s time to mount it to your Camera Tripod:Hold your camera with one hand (grip it firmly) and the quick-release plate with the other.Align the quick-release plate with the slot on the tripod head (look for markers or notches to guide you—most plates only fit one way).Slide the plate into the tripod head until it clicks into place (you’ll feel or hear a small click when it’s properly aligned).Tighten the locking knob or lever on the tripod head (turn clockwise or flip the lever closed) to secure the plate. Give the camera a gentle tug (up and down, left and right) to make sure it’s locked in place—no movement means it’s secure.
4. Balance Your Camera on the Tripod
Balancing your camera on the Camera Tripod prevents it from tipping over and ensures smooth adjustments. Here’s how:
Check the balance: If your camera tilts forward or backward on the tripod, loosen the quick-release plate (slightly) and slide it forward or backward until the camera is level.Tighten the plate again: Once balanced, re-tighten the locking knob/lever to keep the plate in place.Use a spirit level (if available): Many Camera Tripod heads have a built-in spirit level (a small bubble in a tube) to help you level the camera—adjust the tripod legs if needed to center the bubble.
Check the balance: If your camera tilts forward or backward on the tripod, loosen the quick-release plate (slightly) and slide it forward or backward until the camera is level.Tighten the plate again: Once balanced, re-tighten the locking knob/lever to keep the plate in place.Use a spirit level (if available): Many Camera Tripod heads have a built-in spirit level (a small bubble in a tube) to help you level the camera—adjust the tripod legs if needed to center the bubble.
5. Test the Setup (Final Check)
Before you start shooting, do a final check to ensure your camera is safely attached to the Camera Tripod:
Give the camera a gentle shake (hold it with one hand as a backup) to confirm it’s locked in place—no movement is good.Adjust the tripod head (pan, tilt, or rotate) to make sure the camera moves smoothly without slipping.If shooting long exposures or video, double-check the balance—an unbalanced camera will cause blur or shaky footage.
Give the camera a gentle shake (hold it with one hand as a backup) to confirm it’s locked in place—no movement is good.Adjust the tripod head (pan, tilt, or rotate) to make sure the camera moves smoothly without slipping.If shooting long exposures or video, double-check the balance—an unbalanced camera will cause blur or shaky footage.

How to Attach a Smartphone to a Camera Tripod
Smartphones don’t have a built-in threaded hole for tripods, but attaching them to a Camera Tripod is easy with an adapter. Here’s how:
Buy a smartphone tripod adapter (costs $5–$20—most fit phones 4–7 inches, even with cases).Attach the adapter to the quick-release plate of your Camera Tripod: Align the adapter’s 1/4-inch hole with the plate’s screw, then tighten the screw securely.Open the adapter clamp and place your smartphone in the center (ensure the camera lens is unobstructed).Tighten the adapter clamp (gently—don’t squeeze too hard) to hold the phone in place. Give the phone a gentle tug to confirm it’s secure.Mount the quick-release plate (with adapter and phone) to the tripod head—follow steps 3–5 from the previous section.
Buy a smartphone tripod adapter (costs $5–$20—most fit phones 4–7 inches, even with cases).Attach the adapter to the quick-release plate of your Camera Tripod: Align the adapter’s 1/4-inch hole with the plate’s screw, then tighten the screw securely.Open the adapter clamp and place your smartphone in the center (ensure the camera lens is unobstructed).Tighten the adapter clamp (gently—don’t squeeze too hard) to hold the phone in place. Give the phone a gentle tug to confirm it’s secure.Mount the quick-release plate (with adapter and phone) to the tripod head—follow steps 3–5 from the previous section.
Pro Tip: Use a landscape orientation for videos and group photos—this fits more in the frame and is more stable on the Camera Tripod.
Pro Tips for Attaching Camera to Tripod (Safety & Stability)
Now that you know how to attach camera to tripod, use these expert tips to protect your gear and get better shots:
Always Use the Quick-Release Plate: Even if your Camera Tripod lets you attach the camera directly to the head, use the quick-release plate—it’s faster and safer (you can remove the camera quickly in an emergency).Don’t Over-Tighten the Screw: Stripping the threads on your camera or tripod plate is a common mistake. Tighten the screw until it’s secure—no need to use excessive force.Balance Heavy Lenses: If you’re using a camera with a heavy lens (e.g., telephoto lens), attach a lens collar (if available) to the tripod—this distributes weight evenly and prevents strain on the camera’s lens mount.Use a Tripod Weight Hook: Many Camera Tripods have a weight hook on the center column—hang a bag (with rocks, water bottles, or gear) from it to add stability, especially in windy conditions.Keep the Tripod Stable: Before attaching your camera, ensure the tripod legs are fully extended and locked, and the feet are on a flat, stable surface (use rubber feet on hard ground, spike feet on grass/dirt).Store the Quick-Release Plate Safely: When not using your Camera Tripod, attach the quick-release plate to your camera (or store it with the tripod) to avoid losing it—losing the plate means you can’t attach your camera to the tripod.
Always Use the Quick-Release Plate: Even if your Camera Tripod lets you attach the camera directly to the head, use the quick-release plate—it’s faster and safer (you can remove the camera quickly in an emergency).Don’t Over-Tighten the Screw: Stripping the threads on your camera or tripod plate is a common mistake. Tighten the screw until it’s secure—no need to use excessive force.Balance Heavy Lenses: If you’re using a camera with a heavy lens (e.g., telephoto lens), attach a lens collar (if available) to the tripod—this distributes weight evenly and prevents strain on the camera’s lens mount.Use a Tripod Weight Hook: Many Camera Tripods have a weight hook on the center column—hang a bag (with rocks, water bottles, or gear) from it to add stability, especially in windy conditions.Keep the Tripod Stable: Before attaching your camera, ensure the tripod legs are fully extended and locked, and the feet are on a flat, stable surface (use rubber feet on hard ground, spike feet on grass/dirt).Store the Quick-Release Plate Safely: When not using your Camera Tripod, attach the quick-release plate to your camera (or store it with the tripod) to avoid losing it—losing the plate means you can’t attach your camera to the tripod.
Troubleshooting Common Issues (How to Attach Camera to Tripod)
If you’re having trouble attaching your camera to a Camera Tripod, try these quick fixes (based on common user problems):
Screw Won’t Thread Into Camera: Check that the screw is aligned with the threaded hole (don’t cross-thread it—this strips the hole). If it still won’t thread, the screw may be the wrong size (ensure it’s 1/4-inch—most tripods use this standard).Quick-Release Plate Won’t Slide Into Tripod Head: Ensure the locking knob/lever is fully loosened. Check for dirt or debris in the tripod head slot (wipe it clean with a cloth). Most plates only fit one way—flip the plate and try again.Camera Wiggles on the Tripod: Tighten the locking knob/lever on the tripod head. If it still wiggles, check that the quick-release plate is attached securely to the camera (tighten the screw) or that the tripod legs are stable.Camera Tilts Forward/Backward: Loosen the quick-release plate and slide it forward/backward to balance the camera. For heavy lenses, use a lens collar or adjust the tripod head angle.Smartphone Falls Out of Adapter: Tighten the adapter clamp (gently) and ensure the phone is centered. Remove any bulky phone cases (if needed) or use an adapter with a wider clamp.
Screw Won’t Thread Into Camera: Check that the screw is aligned with the threaded hole (don’t cross-thread it—this strips the hole). If it still won’t thread, the screw may be the wrong size (ensure it’s 1/4-inch—most tripods use this standard).Quick-Release Plate Won’t Slide Into Tripod Head: Ensure the locking knob/lever is fully loosened. Check for dirt or debris in the tripod head slot (wipe it clean with a cloth). Most plates only fit one way—flip the plate and try again.Camera Wiggles on the Tripod: Tighten the locking knob/lever on the tripod head. If it still wiggles, check that the quick-release plate is attached securely to the camera (tighten the screw) or that the tripod legs are stable.Camera Tilts Forward/Backward: Loosen the quick-release plate and slide it forward/backward to balance the camera. For heavy lenses, use a lens collar or adjust the tripod head angle.Smartphone Falls Out of Adapter: Tighten the adapter clamp (gently) and ensure the phone is centered. Remove any bulky phone cases (if needed) or use an adapter with a wider clamp.
FAQ: Common Questions About How to Attach Camera to Tripod
Q: How to attach camera to tripod without quick-release plate?
A: If your Camera Tripod doesn’t have a quick-release plate, attach the camera directly to the tripod head: Align the 1/4-inch screw on the tripod head with the threaded hole on your camera, turn the screw clockwise by hand (tighten securely), and lock the tripod head with the knob/lever. This is slower than using a quick-release plate but works for older tripods.
Q: Can I attach any camera to any Camera Tripod?
A: Almost all consumer cameras (DSLR, mirrorless, point-and-shoot) have a standard 1/4-inch threaded hole, so they work with most Camera Tripods. For very large/heavy cameras (e.g., professional medium-format cameras), use a tripod with a 3/8-inch screw (larger standard) and a compatible plate. Smartphones need an adapter to work with any Camera Tripod.
Q: How to attach a camera lens to a tripod?
A: For heavy lenses (e.g., telephoto, zoom lenses), use a lens collar (sold separately or included with the lens). Attach the lens collar to the lens, then attach the collar to the Camera Tripod (via the quick-release plate or directly to the head). This supports the weight of the lens and prevents damage to the camera’s lens mount—never attach the tripod to the camera body alone with a heavy lens.
Q: Is it safe to attach a camera to a tripod with a case?
A: Yes—most camera cases (thin, hard-shell, or leather cases) have a cutout for the 1/4-inch threaded hole on the bottom of the camera. If your case doesn’t have a cutout, you’ll need to remove it before attaching the camera to the Camera Tripod (the case will block the threaded hole).
Q: How to attach a GoPro to a Camera Tripod?
A: Use a GoPro tripod adapter (costs $10–$15)—it has a 1/4-inch screw on the bottom (to attach to the Camera Tripod quick-release plate) and a GoPro mount on top (to attach your GoPro). Simply snap the GoPro into the adapter, attach the adapter to the tripod plate, and mount it to the tripod head—follow the same steps as attaching a camera.
Final Thoughts: Master Camera Tripod Attachment Today
Learning how to attach camera to tripod is a basic skill that every photographer (beginner or pro) needs to master. It’s simple, quick, and critical for protecting your gear and getting sharp, stable shots. Whether you’re using a DSLR, mirrorless camera, smartphone, or GoPro, the core steps are the same: attach the quick-release plate to your camera (or adapter for phones), mount it to the tripod head, balance, and test. With the pro tips and troubleshooting advice in this guide, you’ll avoid common mistakes and feel confident attaching your camera to any Camera Tripod.
Remember, practice makes perfect—take a few minutes to practice attaching and detaching your camera to your Camera Tripod before your next shoot. Once you get the hang of it, you’ll never go back to hand-held shots for landscapes, long exposures, or group photos. A properly attached camera to a tripod is the secret to professional-looking photos and videos that stand out.
how to connect wireless lavalier microphone to phone
how do i use a selfie stick
Related Article
Confused about how to fix half moon wall light? Our simple quick tips help you troubleshoot common issues and get your cozy fixture working again fast.
how to fix half moon wall light
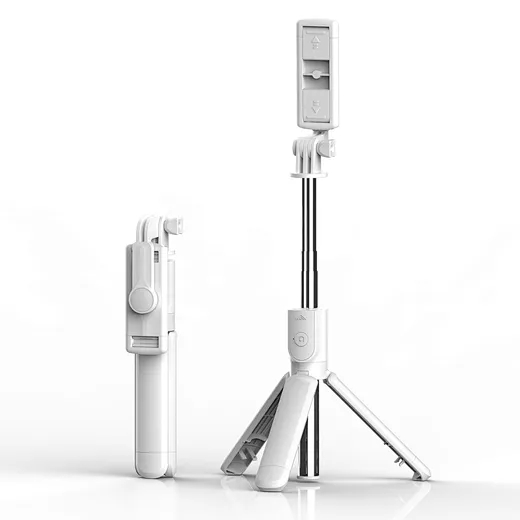
In the age of TikTok, Instagram Reels, and 24/7 live broadcasting, the Selfie Stick has evolved from a "tourist gadget" into an essential professional tool.
who invented selfie stick