how to stick rgb lights on wall
author: LJ
2026-01-23
But if you’ve just unboxed your Rgb Light Stick, figuring out how to stick rgb lights on wall without damaging paint or causing the lights to fall can be tricky. The good news is, with the right prep and techniques, this DIY project is quick and easy for anyone. This 2025 news guide breaks down the process in simple steps, covers wall type compatibility, shares pro tips for long-lasting adhesion, and explains how to get creative with your Rgb Light Stick.
What You’ll Need Before Sticking RGB Lights on Wall
Before diving into how to stick rgb lights on wall, gather these essentials—most Rgb Light Stick kits include the lights and basic adhesive, but you’ll need a few extra tools for a flawless install:
· A Rgb Light Stick kit (includes LED strip lights, power adapter, remote control, and pre-applied adhesive tape).
· Surface prep tools: Microfiber cloth, rubbing alcohol (or mild soap and water), and a dry towel (for cleaning the wall).
· Adhesive backups (if needed): Command strips, double-sided mounting tape (heavy-duty), or adhesive clips (for curved walls or textured surfaces).
· Measuring and marking tools: Measuring tape, pencil, and level (to ensure straight placement).
· Optional extras: Scissors (to cut the Rgb Light Stick at marked intervals), cable clips (to hide wires), and a timer (for automated lighting).
Step 1: Choose the Right Wall and Prep the Surface (Critical for Adhesion)
The first step in how to stick rgb lights on wall is prepping the surface—this determines how well your Rgb Light Stick stays attached. Follow these steps for different wall types:
· Clean the Wall: Wipe the wall with a microfiber cloth dampened with rubbing alcohol (or mild soap and water) to remove dust, grease, and dirt. Dirt and oil break down adhesive, causing the Rgb Light Stick to fall off. Let the wall dry completely (10–15 minutes) before proceeding—moisture ruins adhesion.
· Smooth Walls (Paint, Drywall, Tile): These are ideal forRgb Light Stick adhesion. Ensure the paint is fully cured (no fresh paint—wait 2–4 weeks after painting) to avoid peeling. Avoid matte or textured paint (adhesive sticks poorly to rough surfaces).
· Textured Walls (Popcorn, Plaster): The pre-applied adhesive on Rgb Light Sticks won’t stick well to rough surfaces. Use heavy-duty double-sided tape or Command strips (cut to fit the light strip) for better grip. Avoid peeling paint or damaged plaster—repair first before installing.
· Wooden Walls (Paneling, Furniture): Clean the wood with rubbing alcohol, then test a small piece of adhesive on the wood to ensure it doesn’t damage the finish. Use Command strips for easy removal (great for rental spaces).
Step 2: Plan and Mark the Placement of Your Rgb Light Stick
Before sticking the Rgb Light Stick on the wall, plan your layout to avoid mistakes (once adhesive sticks, it’s hard to reposition without damage). Here’s how:
· Measure the Area: Use a measuring tape to measure the wall (or area) where you want to install the Rgb Light Stick. Cut the light strip at the marked intervals (most Rgb Light Sticks have cut lines every 2–3 inches) with scissors—only cut at these lines to avoid damaging the LEDs.
· Mark the Wall: Use a pencil to lightly mark the wall where the Rgb Light Stick will go. Use a level to ensure the marks are straight—crooked lights look unprofessional. For accent lighting (e.g., behind a TV, around a mirror), trace the outline of the object on the wall first.
· Test the Lights: Plug in the Rgb Light Stick and test the colors, brightness, and remote control before sticking it to the wall. This ensures the lights work correctly—no need to remove and reattach later.
Step 3: Stick the Rgb Light Stick on the Wall (Proper Adhesion Technique)
Now it’s time to stick your Rgb Light Stick on the wall—follow these steps for long-lasting adhesion:
1. Peel the backing off the pre-applied adhesive tape on the Rgb Light Stick—peel 6–12 inches at a time (don’t peel the entire backing at once, as it can stick to itself).
2. Align the Rgb Light Stick with the pencil marks on the wall. Press the light strip firmly against the wall, starting from one end and working your way to the other. Apply even pressure along the entire length (use your fingers or a credit card to smooth out bubbles).
3. For corners or curves: Bend the Rgb Light Stick gently (don’t fold it sharply, as this damages the LEDs). Use adhesive clips or extra double-sided tape to secure the corners—these areas are prone to peeling.
4. If the pre-applied adhesive is weak: Add heavy-duty double-sided tape or Command strips along the back of the Rgb Light Stick (space them 4–6 inches apart) before sticking to the wall. This is especially helpful for textured walls or large light strips.
Step 4: Secure Wires and Test the Installation
The final steps in how to stick rgb lights on wall are hiding wires and testing the setup:
· Hide Wires: Use cable clips or adhesive wire organizers to tuck the power cord and connectors against the wall (or behind furniture). This gives a clean, seamless look—no messy wires hanging down.
· Let Adhesive Set: Wait 24 hours before touching or adjusting the Rgb Light Stick—this allows the adhesive to fully bond to the wall. Avoid pulling or tugging the lights during this time.
· Test Again: Plug in the Rgb Light Stick and use the remote control to test colors, brightness, and modes (e.g., flash, fade, sync to music). Ensure all LEDs are working and the lights stay firmly attached to the wall.
What You’ll Need Before Sticking RGB Lights on Wall
Before diving into how to stick rgb lights on wall, gather these essentials—most Rgb Light Stick kits include the lights and basic adhesive, but you’ll need a few extra tools for a flawless install:
· A Rgb Light Stick kit (includes LED strip lights, power adapter, remote control, and pre-applied adhesive tape).
· Surface prep tools: Microfiber cloth, rubbing alcohol (or mild soap and water), and a dry towel (for cleaning the wall).
· Adhesive backups (if needed): Command strips, double-sided mounting tape (heavy-duty), or adhesive clips (for curved walls or textured surfaces).
· Measuring and marking tools: Measuring tape, pencil, and level (to ensure straight placement).
· Optional extras: Scissors (to cut the Rgb Light Stick at marked intervals), cable clips (to hide wires), and a timer (for automated lighting).
Step 1: Choose the Right Wall and Prep the Surface (Critical for Adhesion)
The first step in how to stick rgb lights on wall is prepping the surface—this determines how well your Rgb Light Stick stays attached. Follow these steps for different wall types:
· Clean the Wall: Wipe the wall with a microfiber cloth dampened with rubbing alcohol (or mild soap and water) to remove dust, grease, and dirt. Dirt and oil break down adhesive, causing the Rgb Light Stick to fall off. Let the wall dry completely (10–15 minutes) before proceeding—moisture ruins adhesion.
· Smooth Walls (Paint, Drywall, Tile): These are ideal forRgb Light Stick adhesion. Ensure the paint is fully cured (no fresh paint—wait 2–4 weeks after painting) to avoid peeling. Avoid matte or textured paint (adhesive sticks poorly to rough surfaces).
· Textured Walls (Popcorn, Plaster): The pre-applied adhesive on Rgb Light Sticks won’t stick well to rough surfaces. Use heavy-duty double-sided tape or Command strips (cut to fit the light strip) for better grip. Avoid peeling paint or damaged plaster—repair first before installing.
· Wooden Walls (Paneling, Furniture): Clean the wood with rubbing alcohol, then test a small piece of adhesive on the wood to ensure it doesn’t damage the finish. Use Command strips for easy removal (great for rental spaces).
Step 2: Plan and Mark the Placement of Your Rgb Light Stick
Before sticking the Rgb Light Stick on the wall, plan your layout to avoid mistakes (once adhesive sticks, it’s hard to reposition without damage). Here’s how:
· Measure the Area: Use a measuring tape to measure the wall (or area) where you want to install the Rgb Light Stick. Cut the light strip at the marked intervals (most Rgb Light Sticks have cut lines every 2–3 inches) with scissors—only cut at these lines to avoid damaging the LEDs.
· Mark the Wall: Use a pencil to lightly mark the wall where the Rgb Light Stick will go. Use a level to ensure the marks are straight—crooked lights look unprofessional. For accent lighting (e.g., behind a TV, around a mirror), trace the outline of the object on the wall first.
· Test the Lights: Plug in the Rgb Light Stick and test the colors, brightness, and remote control before sticking it to the wall. This ensures the lights work correctly—no need to remove and reattach later.
Step 3: Stick the Rgb Light Stick on the Wall (Proper Adhesion Technique)
Now it’s time to stick your Rgb Light Stick on the wall—follow these steps for long-lasting adhesion:
1. Peel the backing off the pre-applied adhesive tape on the Rgb Light Stick—peel 6–12 inches at a time (don’t peel the entire backing at once, as it can stick to itself).
2. Align the Rgb Light Stick with the pencil marks on the wall. Press the light strip firmly against the wall, starting from one end and working your way to the other. Apply even pressure along the entire length (use your fingers or a credit card to smooth out bubbles).
3. For corners or curves: Bend the Rgb Light Stick gently (don’t fold it sharply, as this damages the LEDs). Use adhesive clips or extra double-sided tape to secure the corners—these areas are prone to peeling.
4. If the pre-applied adhesive is weak: Add heavy-duty double-sided tape or Command strips along the back of the Rgb Light Stick (space them 4–6 inches apart) before sticking to the wall. This is especially helpful for textured walls or large light strips.
Step 4: Secure Wires and Test the Installation
The final steps in how to stick rgb lights on wall are hiding wires and testing the setup:
· Hide Wires: Use cable clips or adhesive wire organizers to tuck the power cord and connectors against the wall (or behind furniture). This gives a clean, seamless look—no messy wires hanging down.
· Let Adhesive Set: Wait 24 hours before touching or adjusting the Rgb Light Stick—this allows the adhesive to fully bond to the wall. Avoid pulling or tugging the lights during this time.
· Test Again: Plug in the Rgb Light Stick and use the remote control to test colors, brightness, and modes (e.g., flash, fade, sync to music). Ensure all LEDs are working and the lights stay firmly attached to the wall.

Pro Tips for Sticking Rgb Light Stick on Wall (Avoid Mistakes)
Use these expert tips to get the most out of your Rgb Light Stick installation and avoid common pitfalls:
· Avoid Cold or Damp Walls: Adhesive works best on warm, dry walls. Don’t install Rgb Light Sticks in cold rooms (below 60°F/15°C) or damp areas (e.g., bathrooms without proper ventilation)—moisture and cold break down adhesive.
· Don’t Reuse Adhesive: If you need to reposition the Rgb Light Stick, replace the adhesive tape (old adhesive loses its grip). Use Command strips for easy removal and repositioning (great for renters).
· Cut Only at Marked Lines: Never cut the Rgb Light Stick anywhere other than the marked cut lines—this damages the LED chips and renders the light strip useless.
· Use a Primer for Matte Paint: If your wall has matte or low-tack paint, apply a small amount of adhesive primer (or rubbing alcohol) before sticking the Rgb Light Stick—this improves adhesion without damaging the paint.
· Layer for Ambiance: Install multiple Rgb Light Sticks (e.g., behind a TV and around a window) for layered lighting. Sync them using the remote to create a cohesive mood.
Common Mistakes to Avoid When Sticking RGB Lights on Wall
Skip these errors to ensure your Rgb Light Stick installation is flawless:
· Not Cleaning the Wall: Dust and grease are the #1 cause of adhesive failure—always clean the wall before installing.
· Peeling the Entire Adhesive Backing: This causes the Rgb Light Stick to stick to itself or the floor—peel small sections at a time.
· Installing on Fresh Paint: Fresh paint isn’t fully cured, so adhesive pulls it off the wall—wait 2–4 weeks after painting.
· Pulling the Lights Too Hard: Tugging or pulling the Rgb Light Stick after installation breaks the adhesive bond—handle gently.
· Ignoring Corners: Corners are prone to peeling—use extra tape or clips to secure them.
FAQ: Common Questions About How to Stick RGB Lights on Wall
Q: How to stick rgb lights on wall without damaging paint?
A: Use Command strips or low-tack double-sided tape instead of the pre-applied adhesive (if it’s too strong). Clean the wall with rubbing alcohol first, and avoid pulling the Rgb Light Stick off forcefully—peel it slowly at a 45° angle to prevent paint damage. Test a small area first to ensure the adhesive doesn’t harm the paint.
Q: Can I stick Rgb Light Stick on textured walls?
A: Yes! The pre-applied adhesive won’t stick well to rough surfaces, so use heavy-duty double-sided tape or adhesive clips. Cut the tape into small pieces (2–3 inches long) and attach them along the back of theRgb Light Stick (space 4–6 inches apart). Press firmly to ensure grip—this works for popcorn, plaster, or brick walls.
Q: How long will Rgb Light Stick stay on the wall?
A: On smooth, clean walls, a Rgb Light Stick with good adhesive will stay attached for 1–3 years (or longer with proper prep). On textured walls, it may last 6–12 months (replace tape every 6 months for best results). Avoid moisture, cold, or frequent touching—these shorten adhesion life.
Q: How to remove Rgb Light Stick from the wall without damage?
A: Heat the adhesive with a hair dryer (low heat) for 30–60 seconds to soften it. Peel the Rgb Light Stick off slowly at a 45° angle—don’t pull straight out. If adhesive residue remains, wipe it with rubbing alcohol or a adhesive remover (test on a small area first to avoid paint damage).
Final Thoughts: Stick Your Rgb Light Stick Like a Pro
Learning how to stick rgb lights on wall is simple once you focus on surface prep, proper adhesion, and careful placement. A well-installed Rgb Light Stick transforms any space—whether you’re adding ambiance to a gaming room, accent lighting to a bedroom, or party vibes to a living room. With the steps and tips in this guide, you’ll get a seamless, long-lasting installation that looks professional, no DIY expertise required.
Ready to elevate your decor? Choose aRgb Light Stick with strong adhesive, compatible with your wall type, and follow our guide. Your space will be glowing with vibrant, customizable light in no time!
how to connect professional condenser microphone
how to install magnetic track lighting on ceiling
Related Article
Confused about how to fix half moon wall light? Our simple quick tips help you troubleshoot common issues and get your cozy fixture working again fast.
how to fix half moon wall light
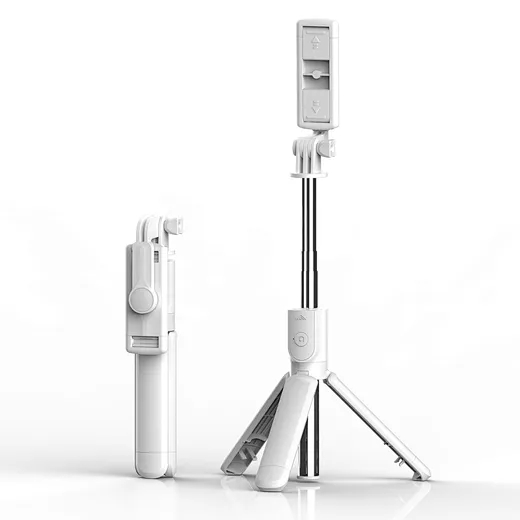
In the age of TikTok, Instagram Reels, and 24/7 live broadcasting, the Selfie Stick has evolved from a "tourist gadget" into an essential professional tool.
who invented selfie stick